
The 4-4-2 is two banks of four players behind a strike partnership, and it remains one of the most reliable shapes in soccer when you want defensive compactness, clear role assignments, and a counter-attacking threat up front. Set it up right and you get a team that is hard to break down, easy to coach, and dangerous on the turn.
Quick setup at a glance:
- Shape: Back four, flat midfield four, two strikers sitting narrow and high
- Best used against: Possession-heavy teams you want to funnel wide; opponents without a natural No. 10
- Rule of thumb: If you're chasing the game, push your wide mids higher; if you're protecting a lead, tuck them inside and defend as a compact 4-4-2 block
- Minimal role orders (sim or real): Central mids: one hold, one box-to-box. Wide mids: engine runners with crossing license. Strikers: one target, one runner making channel runs behind the defensive line.
As The Athletic's tactical analysis notes, modern teams use the 4-4-2 primarily as a defensive mid-block that morphs in possession, synchronizing pressing and restricting central space.
Key Takeaways
The 4-4-2 is most effective as a defensive mid-block that morphs in possession, with compactness, clear role assignments, and a strike partnership as its three core strengths.
| Point | Details |
|---|---|
| Defensive geometry matters | Keep 10–15 meters between your back four and midfield line; total vertical depth should stay under 25 meters. |
| Central mid pairing is decisive | Use a holder plus a box-to-box runner; a double-runner pairing leaves the back four exposed on transitions. |
| Biggest weakness is the 3v2 | Drop your box-to-box CM deeper or switch to a 4-4-1-1 at halftime to solve the midfield overload. |
| Sim testing rule | Change one variable per batch of 10 simulations and track possession %, second-ball wins, and counter-attacking conversion. |
| Ballknw Gaffa for quick testing | Ballknw's no-login Gaffa sim lets you set roles, adjust pressing height, and run matches immediately in-browser. |
Table of Contents
- What does the 4-4-2 formation actually mean?
- What does each position do in a 4-4-2?
- How does a 4-4-2 attack?
- How do you defend with a 4-4-2?
- Which 4-4-2 variation should you use?
- What are the strengths and weaknesses of a 4-4-2?
- How do opponents beat a 4-4-2?
- How have top coaches used 4-4-2?
- How to test 4-4-2 in a management sim
- How to handle transitions in a 4-4-2
- Set-piece tactics in a 4-4-2 take advantage of the formation's aerial threats and defensive organization.
- How to adjust your 4-4-2 against different formations
- My take: when the 4-4-2 is the right call
- Try 4-4-2 in Gaffa right now
- Sources
What does the 4-4-2 formation actually mean?
The numbering reads back to front: four defenders, four midfielders, two forwards. That's it. The "two banks of four" idea is the key concept, because those two horizontal lines are what give the shape its defensive rigidity and its ability to compress the field vertically.
The formation's roots go back decades, but it dominated English and European football through the 1980s and 1990s. At that point, it was the default shape for most professional clubs. Then the rise of the 4-3-3 and 4-2-3-1 pushed it aside at the elite level, as teams sought to win the midfield battle with a numerical advantage. The 4-4-2 looked like a relic.
It wasn't. What happened instead is that tactically sharp managers figured out how to use the shape's compactness as a weapon, particularly out of possession. The formation has since experienced a genuine revival as a defensive framework, with teams morphing into different shapes once they win the ball. A flat 4-4-2 out of possession can become a 3-4-2-1 or a 4-2-3-1 the moment the right back pushes forward. Formations are dynamic, and the 4-4-2 is one of the most adaptable starting points you can choose.
What does each position do in a 4-4-2?
The success of any 4-4-2 depends on every player knowing their primary job. Here's the full position-by-position breakdown, with the player profiles that fit each slot.
Goalkeeper
Primary job: Organize the defensive line, command the box, and distribute quickly to trigger counter-attacks. Key attributes: Positioning, communication, distribution range.
Right back and left back
Primary job: Hold defensive width, support wide mids in pressing, and time overlapping runs carefully. Key attributes: Stamina, 1v1 defending, crossing ability. Full-backs in a 4-4-2 should overlap only when the wide mid has tucked inside and a central mid covers the space. Attacking runs without that cover leave a gap that opponents will find immediately.
Center backs (two)
Primary job: Protect the central channel, win aerial duels, and step to press when the striker triggers it. Key attributes: Aerial ability, composure in possession, reading of play. One CB should be dominant in the air (useful for set pieces both ways); the other can be the ball-playing type who starts build-up sequences.
Wide midfielders (right and left)
Primary job: Track back to form the defensive bank of four, then drive forward to deliver crosses or cut inside. Key attributes: Stamina, crossing or dribbling (depending on variant), defensive discipline. This is the most demanding role in the shape. Wide mids who can't or won't defend will break the entire structure.
Central midfielders (two)
The central midfield pairing is decisive in a 4-4-2. The most effective combination is complementary: one holding midfielder who screens the back four and recycles possession, and one box-to-box runner who arrives late into the penalty area and supports the press. A double-runner pairing can work if both players have elite stamina, but it leaves the defensive line exposed to quick transitions.
Holder profile: Interceptions, short passing, positional discipline. Box-to-box profile: Stamina, late runs, passing range, pressing intensity.
Strikers (two)
The strike partnership is where the 4-4-2 becomes genuinely dangerous. Training the pair together in small-sided routines builds the understanding needed for drop-and-run combinations and near/far crossing patterns.
Target striker: Hold-up play, aerial threat, link-up with the runner. Sets pressing triggers by closing the goalkeeper or center back. Runner: Pace, movement behind the line, channel runs to exploit the space the target creates.
Quick position reference:
- GK: Organizer and distributor
- RB/LB: Defensive width, timed overlaps
- CB x2: Aerial + ball-playing pairing
- RM/LM: Engine runners, defensive discipline required
- CM (hold): Screen, recycle, cover
- CM (box-to-box): Late runs, press support
- ST (target): Hold-up, press trigger
- ST (runner): Pace, channels, movement
How does a 4-4-2 attack?
Three primary attack modes define the 4-4-2 in possession: wide play and crosses, strike-partnership combinations, and direct long-ball second-ball play. Which one you lean on depends on your personnel, but the best 4-4-2 teams can switch between all three within a single sequence.
The three attack modes in order of setup:
-
Wide play and crosses. The wide mid receives in space, drives to the byline or cuts inside, and delivers. The target striker attacks the near post; the runner attacks the far post or peels to the edge of the box for a cutback. Full-backs overlap to create a 2v1 on the flank when the wide mid has tucked inside.
-
Strike-partnership combinations. The target drops short to receive between the lines, plays a quick one-two with the arriving box-to-box CM, and the runner makes a diagonal run behind the defensive line. This "drop-and-run" pattern is the 4-4-2's most dangerous attacking sequence because it pulls a center back out of position.
-
Direct long-ball and second-ball. Play over the press to the target striker, who holds up play or flicks on. The runner, wide mids, and box-to-box CM all sprint to win the second ball. This is Sean Dyche's Burnley in a nutshell: physical, direct, and brutally effective against high defensive lines.
Build-up options:
- Short build through the center: GK to CB, CB to holding mid, spread wide or play through the lines. Works when your holding mid is comfortable on the ball under pressure.
- Long-ball chase: GK or CB plays direct to the target striker. Requires a physically dominant target and runners who can anticipate the flick-on direction.
Pro Tip: Invert one full-back into central midfield during the build-up phase. When your right back tucks inside, you create a 3v2 in the center against a team pressing with two forwards, giving your holding mid a free pass option every time. Modern 4-4-2 implementations do this deliberately to solve the midfield numbers problem.
How do you defend with a 4-4-2?
The 4-4-2's biggest strength is out of possession. Two banks of four protect central spaces and funnel opponents wide, using the touchline as an extra defender. The shape is compact, simple to organize, and hard to break through the middle.
Defensive geometry:
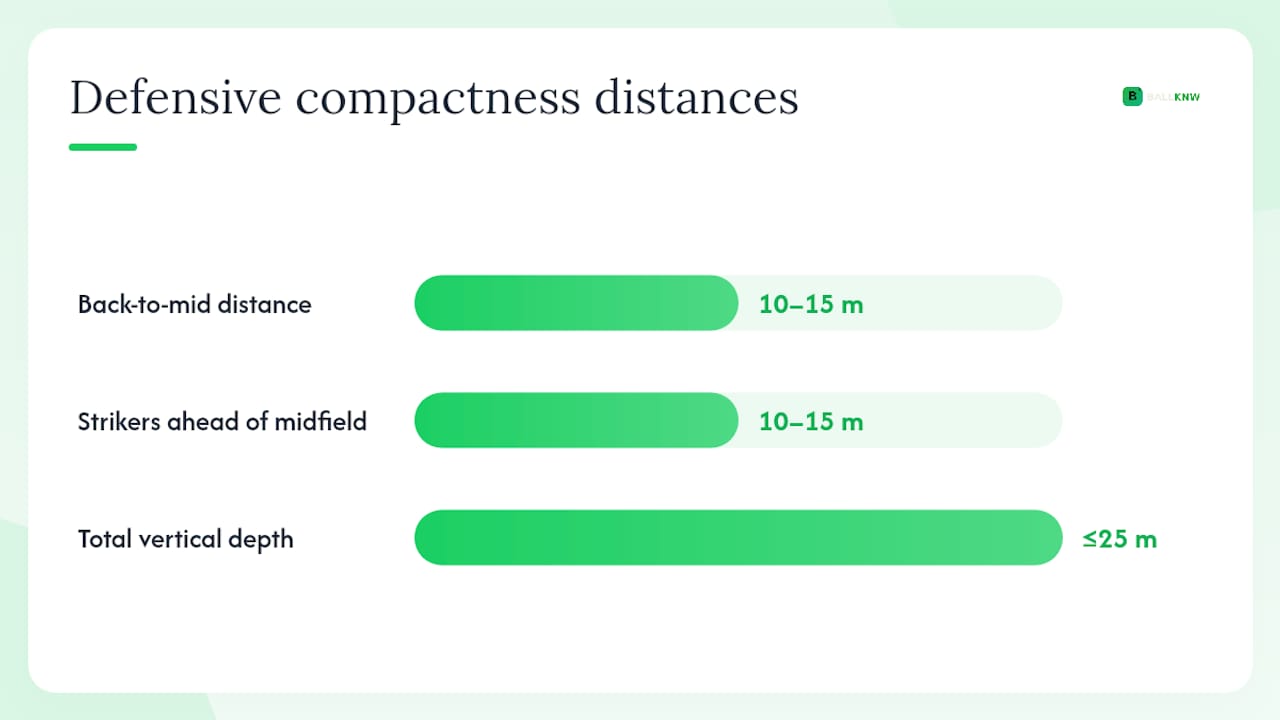
- Keep roughly 10–15 meters between the back four and the midfield four
- Total vertical compactness: no more than approximately 25 meters from the back line to the front of the midfield block
- The two strikers sit 10–15 meters ahead of the midfield line, ready to press or screen passing lanes
Pressing triggers and unit behavior:
- Trigger 1: Goalkeeper or center back in possession. Both strikers press together, angling their runs to block the pass into the holding mid and force play wide.
- Trigger 2: Ball played to a wide defender. The nearest wide mid steps up aggressively; the far-side wide mid tucks inside to cover the central channel; the holding mid shifts across.
- Trigger 3: Poor touch or backward pass under pressure. The entire midfield line steps up simultaneously, creating a "sandwich" trap with the strikers pressing from above and the midfielders closing from below.
The front two function as the primary pressing triggers and create a sandwich trap with midfielders stepping up from below. When the press is well-timed, the opponent has nowhere to play.
Drill cue for coaches: Set up a 4v4 in a 30x20 yard grid. The defending team must press as a unit within three seconds of the trigger. Any defender who steps without the unit pressing together concedes a point. Run it for 10 minutes before full-shape defensive work.
Compactness target: Aim for 10–15 meters between your back four and midfield line, with total vertical depth under 25 meters. Wider than that and the half-space between the lines becomes exploitable.
Which 4-4-2 variation should you use?
The flat 4-4-2 is the base, but three common variants solve specific problems and suit different player profiles.
| Variant | Tactical intent | Best when you have | Key adjustment |
|---|---|---|---|
| Flat 4-4-2 | Defensive compactness, direct counter | Physical wide mids, strong strike pair | Default; no changes needed |
| 4-4-2 diamond | Midfield control, central overload | Creative No. 10, mobile striker | Narrow the mids, add attacking mid behind strikers |
| 4-4-1-1 | Second striker drops, link play | Technical No. 10 who can press | Second striker plays between lines, not alongside |
| Inverted wide mids | Cut inside, shoot, create overloads | Left-footed right mid, right-footed left mid | Wide mids cut in; full-backs provide width |
When to pick each:
The flat 4-4-2 is your default against any opponent. It's the simplest to coach and the hardest to disorganize.
The 4-4-2 diamond solves the midfield 3v2 problem directly. By adding a central attacking mid behind the strikers, you match a three-man midfield numerically and create a player who can operate in the half-space. The trade-off is width: you lose natural wide presence, so full-backs must push higher.
The 4-4-1-1 gives you a more flexible front line. The second striker drops into the space between the opponent's midfield and defense, linking play and pressing from a central position. Diego Simeone has used this shape at Atlético Madrid to devastating effect, with the second striker acting as both a pressing trigger and a creative outlet.
Inverted wide mids turn your wide players into goal threats rather than crossers. Pair this with overlapping full-backs and you get width from deeper positions while your wide mids cut inside to shoot or combine.
Pro Tip: If you're facing a team with a dominant midfield three and your flat 4-4-2 keeps getting overrun centrally, switch to the 4-4-1-1 at halftime. Drop your more technical striker into the No. 10 space. You don't change the defensive shape, but you suddenly have a player who can receive between the lines and relieve pressure.
What are the strengths and weaknesses of a 4-4-2?
Strengths:
- Central compactness. Two banks of four make it genuinely difficult to play through the middle. Opponents are forced wide, where the touchline limits their options.
- Simple to coach. Every player has a clear zone and a clear partner. Role relationships are obvious, which means less confusion during transitions.
- Strike partnership threat. A well-drilled pair creates problems that a lone striker simply cannot. Drop-and-run combinations, near-far runs, and pressing partnerships are all built into the shape.
- Counter-attacking efficiency. Win the ball in your own half and you have two strikers already in position to receive a direct pass and run at goal.
Weaknesses and quick fixes:
- Midfield 3v2 overload. Any team playing with three central midfielders has a numerical advantage in the middle. Fix: Drop the box-to-box CM slightly deeper to create a 2v3 that becomes a 3v3 when the target striker presses the ball carrier.
- Half-space vulnerability. A No. 10 operating between the lines can receive on the turn and face the back four. Fix: The holding mid must track that player aggressively; the nearest CB must be ready to step.
- Isolated full-backs. When wide mids press high, full-backs can be left 1v1 against a winger with no cover. Fix: Stagger the defensive lines so one CB is always ready to cover the full-back's channel.
- Line-breaking passes. A single incisive pass between the midfield and defensive lines can unlock the shape. Fix: Reduce the vertical gap between the two banks to under 15 meters.
How do opponents beat a 4-4-2?
Understanding how teams break down a 4-4-2 makes you better at both defending it and attacking it. The central overload is the primary vulnerability: a midfield three creates a 3v2 that the 4-4-2 cannot solve without adjusting.
Effective opponent tactics:
- Deploy a midfield three. The extra central midfielder receives freely between the lines. The 4-4-2's two CMs can't cover all three opponents, so one always has time on the ball.
- Use a No. 10 in the half-space. A creative player positioned between the wide mid and the CM can receive on the half-turn and drive at the back four before defenders can organize.
- Wide overloads with inverted full-backs. Push an inverted full-back into midfield on one side, creating a 3v2 on that flank. The 4-4-2's wide mid is now defending two players.
- Circulation to stretch the block. Quick ball movement across the back forces the midfield four to slide repeatedly. Eventually, a gap opens on the weak side.
How to react when you're the 4-4-2 team:
- Drop the box-to-box CM between the two CBs during build-up to create a 3v2 against the opponent's two forwards, freeing the ball-playing CB to carry forward.
- Force play wide deliberately. The touchline is your ally; the central channel is where you're vulnerable.
- When a No. 10 drops between the lines, the holding mid must follow. Don't let that player receive on the turn.
How have top coaches used 4-4-2?
Ferguson, Simeone, Hasenhüttl, and Dyche each exploited different strengths of the 4-4-2, and their approaches offer four distinct tactical templates.
Sir Alex Ferguson / Manchester United
Ferguson's 4-4-2 was built around wide midfielders who could attack and defend, with full-backs who timed overlapping runs to create 2v1 situations on the flanks. The strike partnership rotated constantly: one striker dropped to link play while the other made runs behind. The key takeaway is that Ferguson used the shape offensively, not just defensively. His wide mids were expected to deliver crosses and track back, which demanded exceptional stamina and discipline.
Diego Simeone / Atlético Madrid
Simeone's version is the definitive modern defensive 4-4-2. His wide mids tuck inside to form a compact 4-4-2 block, with the full-backs providing width rather than the midfielders. The front two press as a coordinated unit, cutting off passing lanes to the holding midfielder. The result is a team that concedes very little centrally and forces opponents into low-percentage wide positions. The tactical takeaway: compactness is a choice, not a default. Simeone actively coaches his players to maintain specific distances between the lines.
Ralph Hasenhüttl / Southampton
Hasenhüttl used a high-pressing 4-4-2 that looked nothing like Simeone's low block. His teams pressed aggressively from the front, with the two strikers setting the press trigger high up the field. The wide mids were expected to cover enormous distances, pressing wide defenders and then recovering to defensive positions. The striker profile was different too: pace and pressing intensity over physical dominance. The takeaway for sim managers: pressing height is a variable, not a fixed setting. Hasenhüttl's 4-4-2 sat at a very different line height than Dyche's.
Sean Dyche / Burnley
Dyche's 4-4-2 was the most direct of the four. Physical strikers who could win aerial duels and hold up play, wide mids who worked hard defensively, and a low defensive block that invited pressure and hit on the counter. The long-ball second-ball strategy was central to everything. The takeaway: the 4-4-2 doesn't require technical players to be effective. Dyche proved that a well-organized, physically committed team can compete at the highest level with this shape.
How to test 4-4-2 in a management sim
Ballknw's Gaffa is a no-login, browser-based football management sim that lets you set up a 4-4-2, adjust tactical instructions, and run matches immediately without creating an account. It's the fastest way to test whether a specific role setup or pressing height actually works before committing to it in a real coaching environment.
Step-by-step setup:
- Set roles. Assign your holding mid and box-to-box mid explicitly. Set wide mids to "engine" or "winger" depending on your variant. Set one striker to "target" and one to "runner" or "poacher."
- Adjust line height and pressing triggers. Start with a mid-block (line height 45–55 out of 100). Set pressing triggers to "ball played to wide defender" and "goalkeeper in possession." Run five matches at this setting before changing anything.
- Pick player traits. Prioritize stamina for wide mids, aerial ability for your target striker, and interceptions for your holding mid. Use the Draft XI squad-building guide to identify players who fit each profile.
- Run controlled test fixtures. Choose opponents with a midfield three to stress-test your central compactness. Run 10 simulations per variable change.
Metrics to watch and target ranges:
Pro Tip: Change only one variable per batch of 10 simulations. Swap the holding mid for a box-to-box player, run 10 matches, record the metrics, then swap back. This A/B approach is the only way to know whether a change actually improved your 4-4-2 or whether you just got lucky with the fixture list.
How to handle transitions in a 4-4-2
Transitions are where the 4-4-2 wins or loses matches. The shape is well-organized in both phases, but the moments between them are where discipline breaks down.
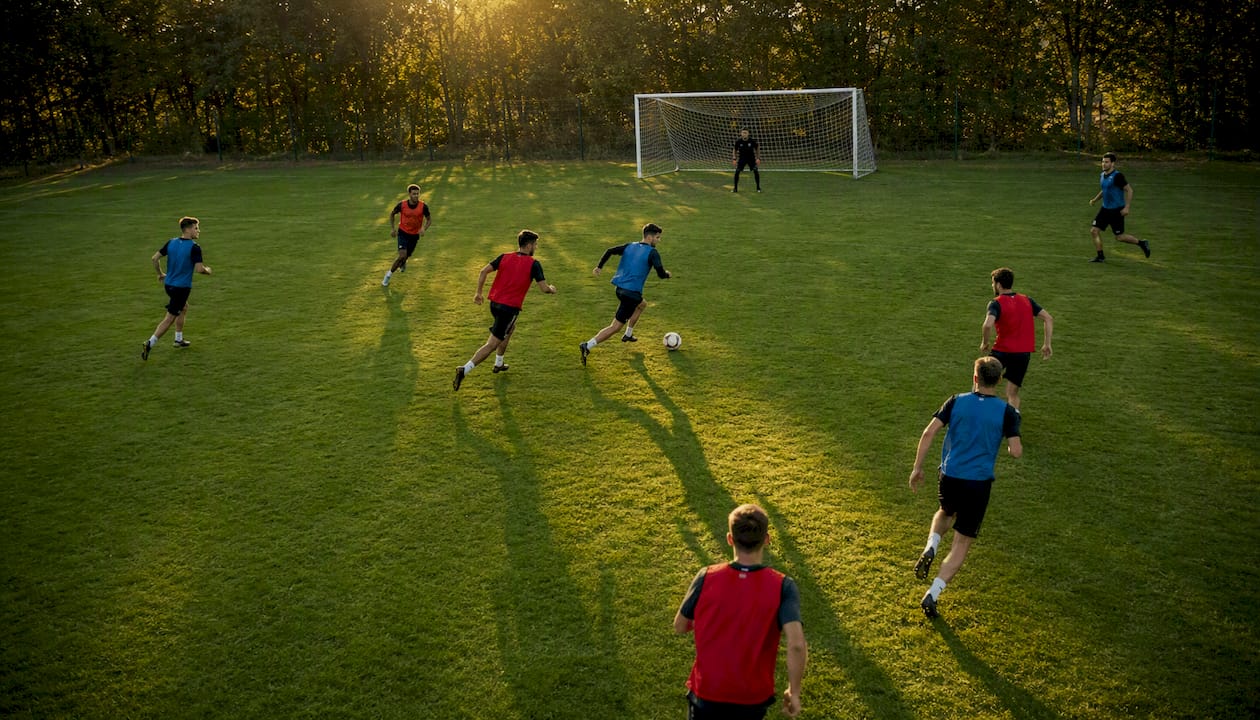
Losing possession (negative transition): The two strikers must immediately press the ball carrier or block the passing lane to the opponent's holding mid. They don't need to win the ball; they need to buy three seconds for the midfield four to drop into their defensive block. Wide mids sprint back to their defensive positions first, before the full-backs. The holding mid drops between the CBs to protect against the quick counter.
Winning possession (positive transition): The target striker holds the ball or lays it off to the nearest CM. The runner immediately makes a diagonal run behind the defensive line. The box-to-box CM drives forward to support. Wide mids push up on their respective flanks. The full-backs hold their positions initially, providing a safety valve if the attack breaks down. Speed of transition is the 4-4-2's biggest weapon: two strikers already in position means you can go from defensive block to counter-attack in two passes.
The critical coaching point is that transitions are rehearsed, not improvised. Run transition drills where the coach calls "lose it" or "win it" and the team must reorganize within five seconds. That habit is what separates a well-drilled 4-4-2 from a disorganized one.
Set-piece tactics in a 4-4-2 take advantage of the formation's aerial threats and defensive organization.
Offensive corners: Both strikers move into the box focusing on strategic areas like near and far posts. Wide midfielders and central midfielders cover delivery and potential second-ball opportunities.
Defensive corners: Utilize a zonal or hybrid marking system with key players assigned to critical zones including posts and near/far posts, while others track opponents and prepare for counter-attacks.
Offensive free kicks: Strikers position themselves to capitalize on delivery, with mids attending second-ball scenarios.
Defensive free kicks: Form a defensive wall with a few players while the others mark key threats and the goalkeeper organizes shape.
How to adjust your 4-4-2 against different formations
The 4-4-2 is not a one-size-fits-all solution. Against certain formations, you need specific adjustments to avoid being tactically outmaneuvered.
Against a 4-3-3: This is the toughest matchup. The opponent's three central midfielders create a 3v2 against your CMs. Drop the box-to-box CM slightly deeper to create a 2v3 that becomes manageable when the target striker presses the deepest CM. Push your wide mids higher to press the opponent's wide forwards and prevent them from receiving in space.
Against a 4-2-3-1: The No. 10 operating between your midfield and defensive lines is the primary threat. Your holding mid must track that player aggressively. The two CBs must communicate constantly about who steps and who covers. Consider dropping your line height slightly to reduce the space between the lines.
Against a 3-5-2 or 3-4-3: The opponent's wing-backs will create width problems for your wide mids, who must choose between tracking back defensively or pressing forward. The solution: your full-backs hold their positions and take the wing-backs, while your wide mids stay in the midfield block. This effectively turns your shape into a 4-6-0 out of possession, which is compact but limits your counter-attacking threat.
Against another 4-4-2: Mirror the shape and win the individual battles. The team with the better central midfield pairing usually controls the match. Focus your energy on the wide areas: win the 1v1 battles on the flanks and you create crossing opportunities that the opponent's flat back four must defend.
My take: when the 4-4-2 is the right call
The 4-4-2 gets dismissed as a relic by coaches who've never had to defend a 3v2 in midfield with a squad that doesn't have three elite central midfielders. That's the real reason the formation fell out of fashion at the top level: it requires two wide midfielders who can defend and attack, which is a rare and expensive player profile. Most clubs don't have them.
But for the vast majority of teams, the 4-4-2 is the most honest formation available. It doesn't hide weaknesses behind positional complexity. If your wide mids can't track back, you'll know immediately. If your strike partnership has no chemistry, the attacking patterns fall apart. The shape forces accountability in a way that a 4-3-3 or a 4-2-3-1 doesn't.
My three quick in-game adjustments when the 4-4-2 is struggling:
- Drop the box-to-box CM between the CBs during build-up to solve the midfield overload temporarily.
- Switch one wide mid to stay wider and stop tucking inside, which forces the opponent's full-back to stay home rather than joining attacks.
- Change the pressing trigger from "always press" to "ball played wide" to reduce the energy cost and tighten the defensive block.
The formation is not outdated. It's just demanding. Get the personnel right and the role assignments clear, and it's still one of the most effective shapes in the game.
Try 4-4-2 in Gaffa right now
Gaffa on Ballknw lets you set up a 4-4-2 in under two minutes, no account required. Pick a real club from a major league, assign your roles, set your pressing triggers, and run a match immediately. Your progress saves directly in the browser, so you can pick up where you left off without logging in.

Three steps to get started: visit Ballknw, open Gaffa, select your club and set the 4-4-2 formation with the role assignments from this guide. If you want to test across more platforms, the best football manager games for PC page lists additional options for running larger batch simulations with custom tactics.
Sources
- The Tactics Board: How the 4-4-2 works - The Athletic
- Goal
- 4-4-2 Formation Explained — Build-up, Press, Mid Block, Strike Partnership | Tactico
- 4 4 2 soccer formation - how to play, strengths & weaknesses